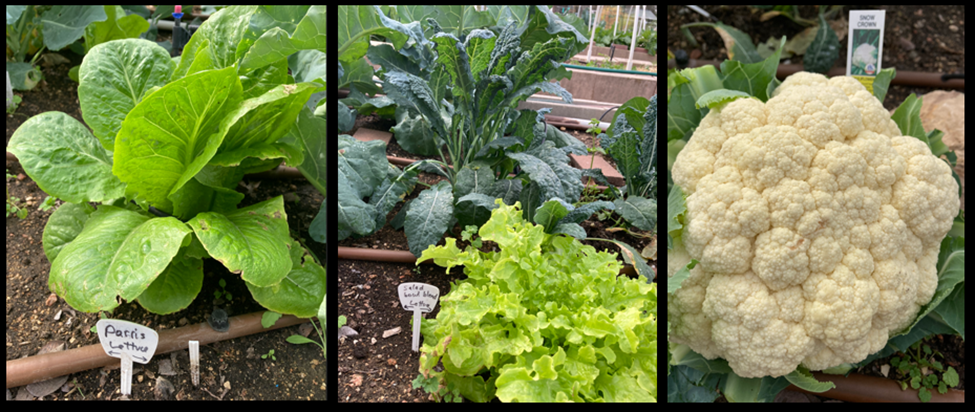
Yikes, my garden is producing too many vegetables! Every other day I am picking heads of broccoli, cauliflower, cabbage, and lettuce! What do I do with it all? My husband and I don’t need much food (and he does not eat vegetables), so it ends up all on my plate (so to speak). But I am still eating last year’s harvest—which I am just now digging out of the deep corners of my freezer. It takes me a year to rotate through all my stored food supply.
Before refrigeration was invented, farmers would “can” or ferment the excess food. Fermentation increases the nutritional content of foods and extends their “shelf life”. I wrote a previous article on fermented foods that you can find HERE (The Power of Fermented Foods). People seemed healthier back then, before processed foods came on the market, and one reason may have been they ate more fermented foods.
Can you Ferment Cauliflower?
After the harvest, a large cauliflower was sitting on my counter. Can I ferment a cauliflower? “Google” says I can, and it offers numerous recipes, all similar to making sauerkraut. One recipe gives me the basics: “To ferment cauliflower, cut a head of cauliflower into florets and pack them into a jar. Prepare a brine with filtered water and sea salt, pour it over the cauliflower to ensure it’s fully submerged, and let it ferment at room temperature for 3-5 days before transferring it to the fridge.”

Wishing For My Grandmother’s Recipe
Instead of a Google recipe, I found myself wishing my grandmother had taught me how to do this. Wouldn’t it have been nice to learn it at her kitchen table instead of from a screen? I scoured my old cookbooks but didn’t find a single recipe for fermenting cabbage, let alone cauliflower. My Betty Crocker’s Cookbook (1969) came up empty—sauerbraten, yes, but not sauerkraut. Joy of Cooking was just as sparse, offering recipes that use sauerkraut but none that explain how to make it.
After some research, I found a book called Wild Fermentation (Sandor Ellix Katz, 2003). The book explains that fermentation (sometimes called “lacto-fermentation”) is a process in which the natural bacteria—called lactic acid bacteria—found on a food item are allowed to proliferate in a controlled manner. These bacteria occur naturally on fruits, grains, vegetables, even in milk and meat. There is no need to add a “starter” to begin fermentation (link, link). I was ready to go! For this fermentation I used a cauliflower from my garden, but if you don’t have a garden, try to purchase an organic cauliflower from the store, OR, go to your local farmer’s market.
Jump to Recipe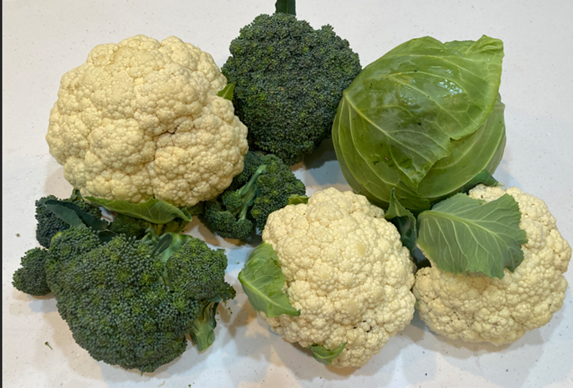
I Started to Prep the Cauliflower
I cut the cauliflower into nice, small pieces so they would fit into my quart Mason jar. I found some dill seed (not to be confused with dill weed) in the back of my pantry. I even found a bay leaf. You can add almost any spice you like to a fermented vegetable. As I chopped, I found a little friend…
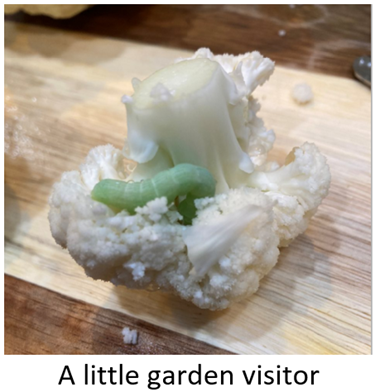
After placing my little friend back out in the garden, I continued with the prep.
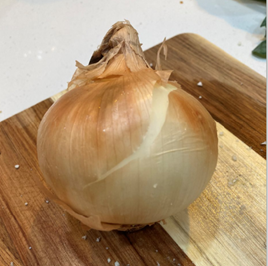
I chopped an onion to add to the ferment.
Making the Brine
Salt is used to ferment vegetables and it should be a high-quality sea salt—not table salt that has other undesirable ingredients. I used some Himalayan Sea Salt at the ratio of 1 tablespoon in 2 cups of water (see recipe below for details).
I used spring water insteadof tap water to make my brine. The chlorine or fluoride in tap water can kill the good bacteria on the vegetables. You need the good bacteria to make the fermentation happen. (This makes me wonder: what is tap water doing to my gut biome when I drink from the local water supply? Hmm…)
Why Cauliflower is Easier Than Sauerkraut
I found that it is easier to make a cauliflower ferment than a cabbage ferment (sauerkraut) since there is no need to pound the bejeebers out of cauliflower the way you do with cabbage (although pounding the bejeebers out of something may have some therapeutic value). Pounding cabbage is done to release the juices. If you pound the cauliflower, you would have mush!
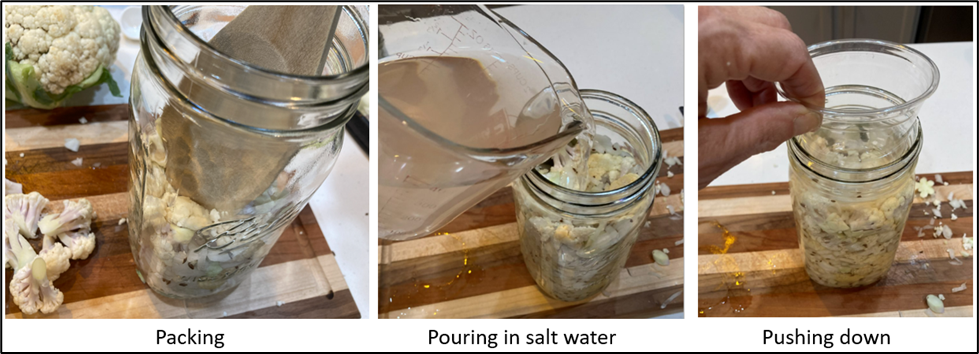
Everything came together perfectly. I packed the vegetables into a quart Mason jar. I pushed the vegetables below the level of the salt water. I set a cup (or the bottom of a heavy glass) on top of the veggies to keep them submerged.
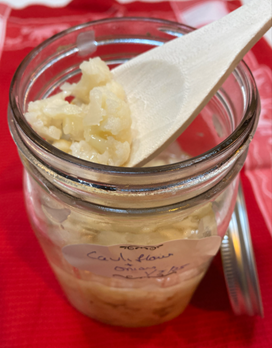
I marked a start-date on the jar, covered it loosely with a piece of plastic, and allowed my cauliflower to sit on the counter for about 10 days. I observed small bubbles of carbon dioxide rising to the surface as it fermented. I tasted it after about 10 days to two weeks and found the cauliflower to be crisp and flavorful. At that point I capped it with a screw cap and put it in the fridge to enjoy!
Are Home-Made Ferments Safe to Eat?
Some of you may ask the question, “How do I know it is safe to eat?” or “Can it cause food poisoning?” Sandor Katz (Wild Fermentation) replies that he has never experienced this or heard of anyone getting ill. The salt water inhibits the wrong bacteria from taking hold, until the lactic acid builds up and gives your ferment a nice sharp (or tart) taste. Clearly, if you have any reservation about your ferment, you can “feed it to your compost pile”.

Fermented Cauliflower
4-8
servingsIngredients
1 Head of cauliflower (organic or from your garden, or farmers market)
1 small onion, chopped
1 bay leaf
Dill seed
2 cups bottled spring water (not from the tap)
Sea salt (about 1 T)
1-qt wide-mouth Mason jar
Directions
- Chop the cauliflower into small florets. Chop the onion into small pieces. Sprinkle the dill seed over the vegetables.
- Pack everything into the jar, leaving about 2 inches of space at the top. Slide the bay leaf into the jar.
- Mix about 2 cups of water with the 1 T sea salt. Pour the salt water into the jar. You should be able to cover the cauliflower completely. (Mix more water and salt if needed.)
- Place something heavy on top of the cauliflower in order to hold it down and keep it submerged. This could be a heavy glass or even a small potato in a zip-lock bag works well. (I have been known to put a small rock inside a zip-lock bag as well).
- Cover loosely with a towel to keep the fruit flies away and keep at room temperature for about 1 week to 10 days. You can taste it at this time to see if it is how you like it. If you are happy with the tartness, put a lid on the jar and place it in the fridge. If you would like it more tart, leave it on the counter a few more days. Enjoy!
Notes
- Would you like to see a similar recipe? Go Here.
Always talk to your health professional before starting anything new. This information is not intended to diagnose, treat or cure any condition and is intended only for entertainment. I welcome your comments.
Very interesting, Jackie! I am impressed with your abundant garden and your green thumb!
Ahhh… the benefits of good photography- it makes my garden look larger than it really is!
Wow! A bounteous garden indeed! And thanks for the easy to follow recipe for fermenting cauliflower. I eat Eden Foods spicy kimchi regularly, but its’ not the same as making it from scratch. Kudos to you!