Okay, I admit it—I would love to have a real homestead and grow all my own food, but I struggle to get even a few vegetables to thrive. How hard can it be? My yard is full of ornamental bushes and native plants, but barely a squash or zucchini survives.
In addition to the failing squash and zucchini, I’ve tried tomatoes and bell peppers, which are easy to grow, but being nightshades, my body doesn’t like them (they keep me up at night) so I don’t grow them anymore. And I don’t much like cucumbers either, so those are out.
This spring, I decided to try something different-
Green Beans!
First, I needed an improved garden bed. Most vegetables need plenty of sunlight—at least six hours of full sun each day—so location is important. I already had a garden bed; it just happened to be filled with ornamental shrubs. Out came the shrubs, and, after a little soil preparation (compost to loosen up the soil), I was ready to plant my green beans. Fortunately, the bed faces south and is backed up to my house, providing some protection against the elements.
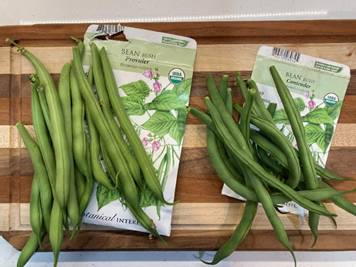
I planted several varieties of green beans—Provider, Maxibel, and Contender (more info here). I was able to plant in February because we had a warm winter (sort of). Normally, the earliest planting time in my zone (8b) is mid-March, so I was taking a risk by planting that early. Because of this, I had to cover the plants twice during freak snow storms (rare in my part of Texas), but otherwise, my gamble paid off.
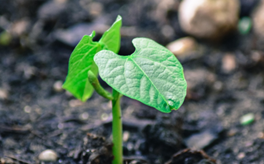
But at first, nothing sprouted. I made a quick environmental check—damp soil, warm weather. My “Provider” beans were just not providing! I planted more seeds, thinking to myself that maybe the first batch had simply rotted away. All this work did not guarantee that I would get something edible to eat, but I was setting the stage for Mother Nature to do the rest.
After a few more days my green beans finally sprouted.
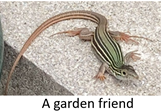
Of course, in my part of Texas, I’m not the only one interested in fresh vegetables. We have plenty of garden raiders, including armadillos, skunks, and deer, all of which seem to think a vegetable garden is an all-you-can-eat buffet. That meant I had to get a little creative when it came to protecting my hard-earned produce.
The tiny seedlings were attacked by birds (or maybe mice?) They picked off the spent seed casings and the first tiny leaves. A plant can’t grow without at least one leaf! To fix this, I laid lightweight netting over the garden to keep the small critters away.
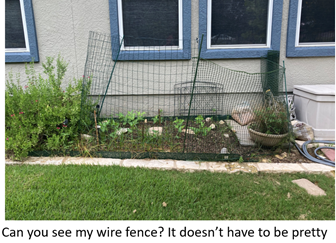
To keep the deer out, I rigged up a wire fence across the front and both ends of the garden. The side of my house protected the back of the garden. The fence discouraged the deer and other small animals.
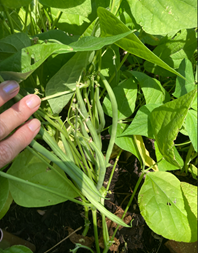
Within a few weeks, I had sturdy bean stalks and a few white flowers. Another week later, I started getting nice green beans. Life was good.
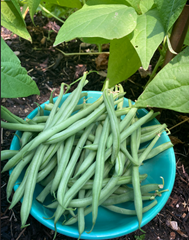
And before I knew it, I was collecting many bowls of green beans! Amazingly, they were not eaten by bugs, nor did they rot in the stretch of heavy rain we started to get.
It was wonderful to grow my own produce, and not have to buy vegetables from the supermarket. But then I had to deal with the abundance. What do I do with all these green beans? I can only eat so many green bean casseroles. After giving some away to a neighbor, I decided to freeze the excess harvest.
First, I washed and trimmed the beans. Next, I immersed them in boiling water for three minutes (this is called blanching). Then I cooled them by dunking them in cold water for a few minutes to stop the cooking process. Finally, I bagged them up and put them in the freezer.


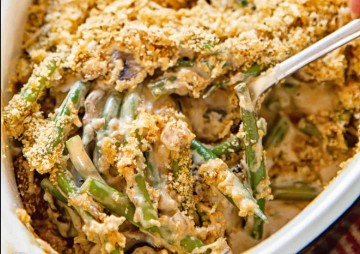
Now For the Green Bean Casserole Recipe
Most green bean casserole recipes are simply green beans mixed into a white sauce (or canned mushroom soup) and topped with something crunchy, such as Panko-style bread crumbs, crispy onions, or even potato chips. Since I need to be gluten-free, and prefer to avoid processed foods, I made my own healthier version of the recipe.
I started with a white sauce made from organic whole milk (raw milk is better), sweet rice flour (Koda Farms Sweet Rice Flour), and butter from grass-fed cows (Kerrygold salted). I added a little ground mustard, salt, and pepper for seasonings. I also mixed in organic shredded cheddar cheese to boost both the flavor and nutritional value. For the crunchy topping, I use gluten-free Panko bread crumbs.
There are many variations of green bean casseroles, so look around and give one a try. Here is my recipe:
Green Bean Casserole
4-6
servingsA creamy sauce covers fresh green beans with a crunchy topping.
Ingredients
12 oz of fresh green beans
2 ½ T sweet rice flour (or all-purpose flour)
Salt and pepper to taste
1 tsp dry mustard
2 ½ cups whole milk
2 T butter
1 (8 ounce) package shredded cheddar cheese divided
1 cup Panko crumbs
Directions
- Preheat the oven to 400 degrees F
- Wash, cut and cook the green beans in boiling water till tender. Drain off water.
- In a small bowl mix the dry ingredients – flour, salt and pepper, dry mustard
- Add some of the milk to the dry ingredients and make a smooth slurry.
- Melt the butter in a medium saucepan over low heat.
- Add the milk slurry to the saucepan and stir until it starts to thicken. Then add the remaining milk to the saucepan, stirring to break up clumps. Cook gently until thickened.
- Add about half the shredded cheese and stir till smooth.
- Dump green beans, and sauce into a medium baking dish, stirring gently.
- Sprinkle remaining shredded cheese and the Panko on top.
- Bake for 30 min or until bubbly and light brown.
Well, there you have it! My dream homestead is out of reach at the moment, but at least I have a freezer full of green beans!
Always talk to your health professional before starting anything new. This information is not intended to diagnose, treat or cure any condition and is intended only for entertainment. I welcome your comments.
Congratulations on your harvest! You and your green thumb are inspiring. Thank you for the step-by-step information on freezing the string beans properly and for the recipe, which sounds delicious!
Great information as usual. My husband is a gardener and we love our green beans!!
Our over abundance problem each year is with tomatoes. They do not keep long, and even giving a lot away, we end up tossing a lot out. Thank you so much for your recipe!
Well good for you growing, cooking, and freezing green beans! I really like green string beans, but in the stores they sell mostly cut green beans which I don’t care for. I once had a basil jungle in my front porch room, it just grew and grew and grew, and when I went to West Virginia I took several plants with me, and gave them away along the way.
Oh my, BASIL jungle! I would make pesto every day if I had that much basil!